Part of series: kinote beginner's guide
kintone APIで取得したデータをカレンダー形式で可視化する
この記事の概要
- FullCalendarを使用して、取得したデータをカレンダー形式で可視化する手順
1. 事前準備
kintoneアプリのデータをAPIで取得する方法を参考に、kintone APIトークンを取得し、プロキシサーバーを構築してください。
2. FullCalendarでカレンダーを表示する
2-1. FullCalendarの読み込み
FullCalendarは、カレンダー表示のためのライブラリです。今回はCDNを使って直接読み込みます。以下のHTMLファイルを作成します。
<!DOCTYPE html>
<html lang="ja">
<head>
  <meta charset="UTF-8">
  <meta name="viewport" content="width=device-width, initial-scale=1.0">
  <title>kintone API Data Calendar</title>

  <!-- FullCalendarのスタイルとスクリプトを読み込み -->
  <script src='https://cdn.jsdelivr.net/npm/fullcalendar@6.1.15/index.global.min.js'></script>


</head>
<body>
  <h1>kintone APIのデータをカレンダーで表示</h1>
  <div id='calendar'></div>

  <script src="script.js"></script>
</body>
</html>
2-2. JavaScriptファイルの作成
次に、script.jsというファイルを作成し、kintone APIからデータを取得し、カレンダーに表示するためのスクリプトを記述します。
// kintoneのサブドメイン、アプリID、APIトークンを設定
const appId = 'your-app-id';         // 活動履歴アプリのアプリID
const apiToken = 'your-api-token';   // 取得したAPIトークン

// kintone APIのURL (プロキシサーバー経由)
const apiUrl = `http://localhost:3000/kintone/k/v1/records.json`;

// 担当者ごとのカラーを記憶するマップ
const colorMapping = {};

// ランダムカラーを生成する関数
function getRandomColor() {
  const letters = '0123456789ABCDEF';
  let color = '#';
  for (let i = 0; i < 6; i++) {
    color += letters[Math.floor(Math.random() * 16)];
  }
  return color;
}

// 担当者に対してランダムカラーを割り当て、既存の担当者には既存の色を使う
function assignColorToCorrespondent(correspondentName) {
  // 担当者が既にカラーを持っていない場合、新しいランダムカラーを割り当て
  if (!colorMapping[correspondentName]) {
    colorMapping[correspondentName] = getRandomColor();
  }
  return colorMapping[correspondentName];
}

// kintone APIへのリクエスト設定
const requestOptions = {
  method: 'GET',
  headers: {
    'X-Cybozu-API-Token': apiToken,
  }
};

// FullCalendarの初期化
document.addEventListener('DOMContentLoaded', function () {
  const calendarEl = document.getElementById('calendar');
  const calendar = new FullCalendar.Calendar(calendarEl, {
    initialView: 'dayGridMonth', // 月間表示
    headerToolbar: {
      left: 'prevYear,nextYear prev,next today',
      center: 'title',
      right: 'dayGridMonth,timeGridWeek,timeGridDay'
    },
    events: [], // イベントデータを後で追加
  });

  // カレンダーを表示
  calendar.render();

  // kintone APIからデータを取得
  fetch(`${apiUrl}?app=${appId}`, requestOptions)
    .then(response => response.json())
    .then(data => {
      const events = data.records.map(record => {
        const correspondentNames = record.対応者.value.map(user => user.name).join(', ');
        const projectName = record.案件名.value; // 案件名

        // 担当者に応じた色をランダムまたは既存の色で設定
        const eventColor = assignColorToCorrespondent(correspondentNames);

        return {
          title: `${projectName} (${correspondentNames})`, // 案件名と担当者名
          start: record.対応日時.value, // 対応日時をイベントの開始日時に
          allDay: true, // 終日イベントとして扱う
          color: eventColor, // 担当者によって色を変更
          extendedProps: {
            description: `案件名: ${projectName}, 担当者: ${correspondentNames}`
          }
        };
      });

      // イベントをカレンダーに追加
      events.forEach(event => {
        calendar.addEvent(event);
      });
    })
    .catch(error => {
      console.error('Error fetching records:', error);
    });
});
2-3. カレンダー表示と動作確認
index.htmlとscript.jsを同じディレクトリに保存してください。index.htmlをブラウザで開くと、カレンダーが表示されます。- kintone APIから取得した対応者と対応日時がカレンダーにイベントとして表示されているはずです。
カレンダー表示の例
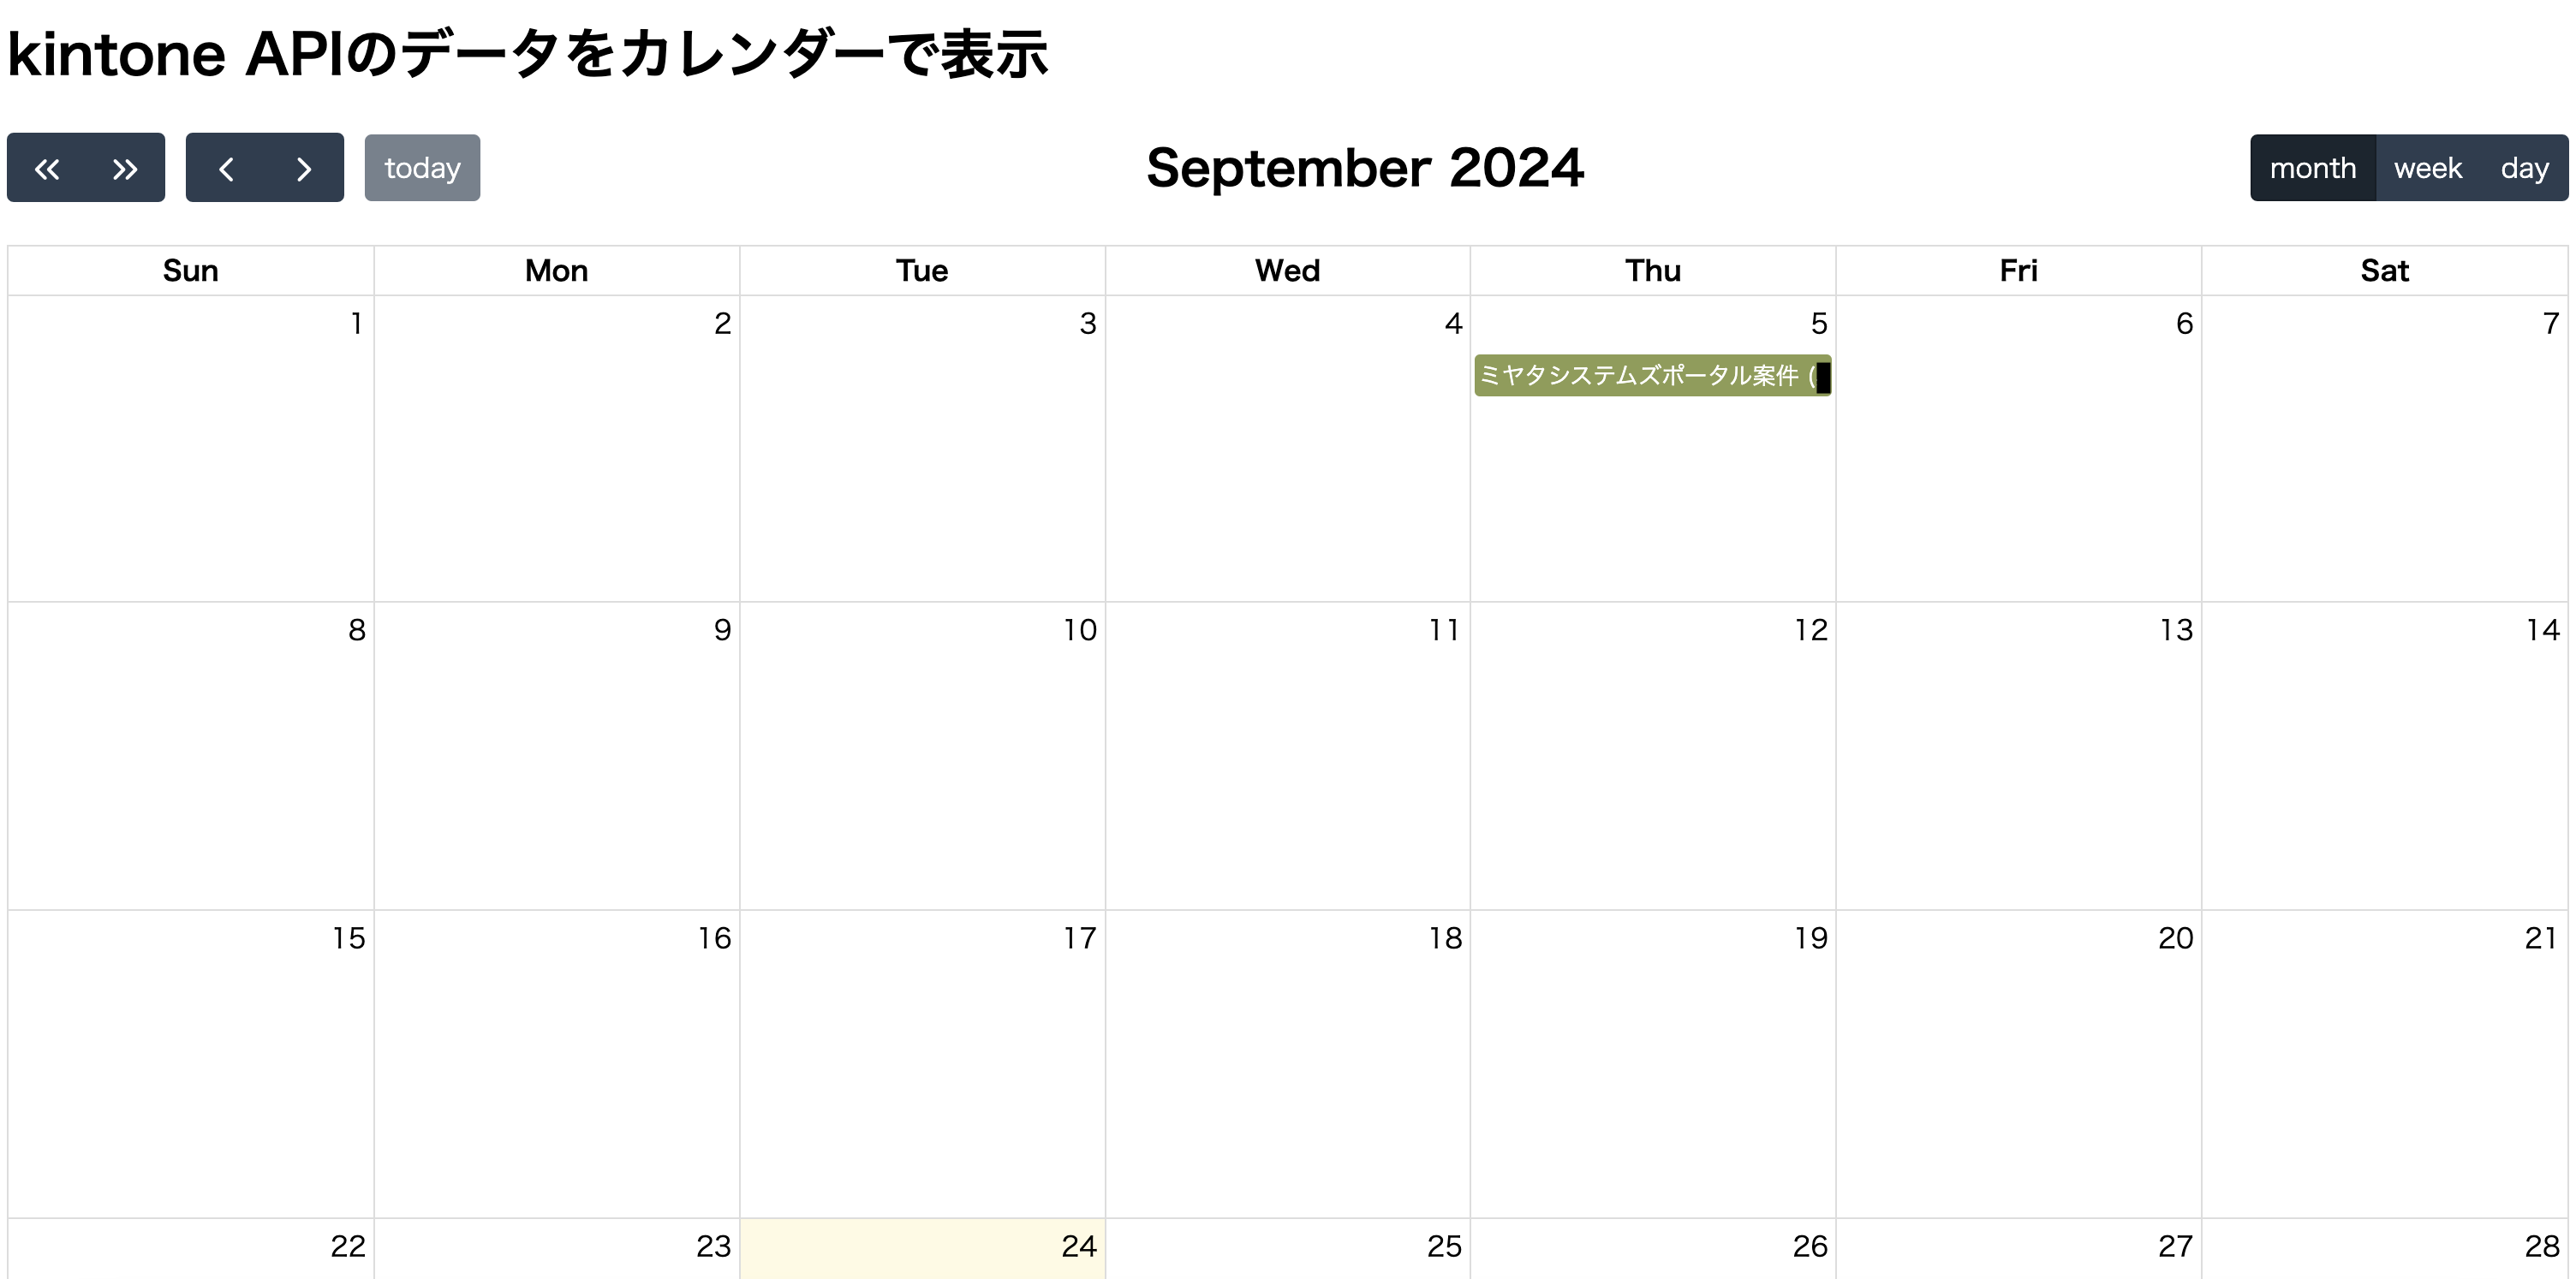
このカレンダー表示を活用することで、kintoneのデータを視覚的に管理することができます。対応者のスケジュール管理や対応日時の確認が簡単になり、プロジェクトやタスクの管理に役立ちます。
3. まとめ
この記事では、kintone APIから取得したデータをカレンダー形式で表示する方法を学びました。FullCalendarを使用することで、対応者や対応日時などのイベントを視覚的に管理できるようになります。今後、さらに詳細なカスタマイズやフィルタリング機能を追加することで、より高度なカレンダー機能を実装することも可能です。
引き続き、kintone APIの可能性を活用し、業務効率化に役立てましょう。